As when working on other types of shower valves, start by shutting off the water supply and protecting the tub and drain Champion Plumbing Cape Coral with rags. Ideally, your shower plumbing will have a local water supply valve that you can shut off (similar to the valve under a sink) that is accessible through a removable panel. In most cases, there isn’t one of these, so you’ll need to shut off the main valve for the entire house.
Open a nearby faucet to empty the shower pipes. Before beginning, please read the information titled “Advice for Fixing Leaky Shower Faucets” above. If your defective shower valve is made by Price Pfister, you’ll be happy to know that they stand behind their products with a strong warranty. If you can prove that you bought their valve after 1997, they will send you free parts. It’s definitely worth a call to their 800 number at 1-800-732-8238. You can also buy a replacement valve on Amazon.
1 Pry the decorative button off of the end of the shower stem to expose the screw that secures the handle assembly. Use a Phillips screwdriver to remove the screw, turning it counterclockwise. Then remove the handle assembly.
2 Next, unscrew the threaded sleeve, turning it counterclockwise, and remove it from the escutcheon trim plate. If the escutcheon trim is caulked to the wall, use a sharp knife to cut the seal. Be careful not to scratch the surfaces. Remove the plate from the wall.
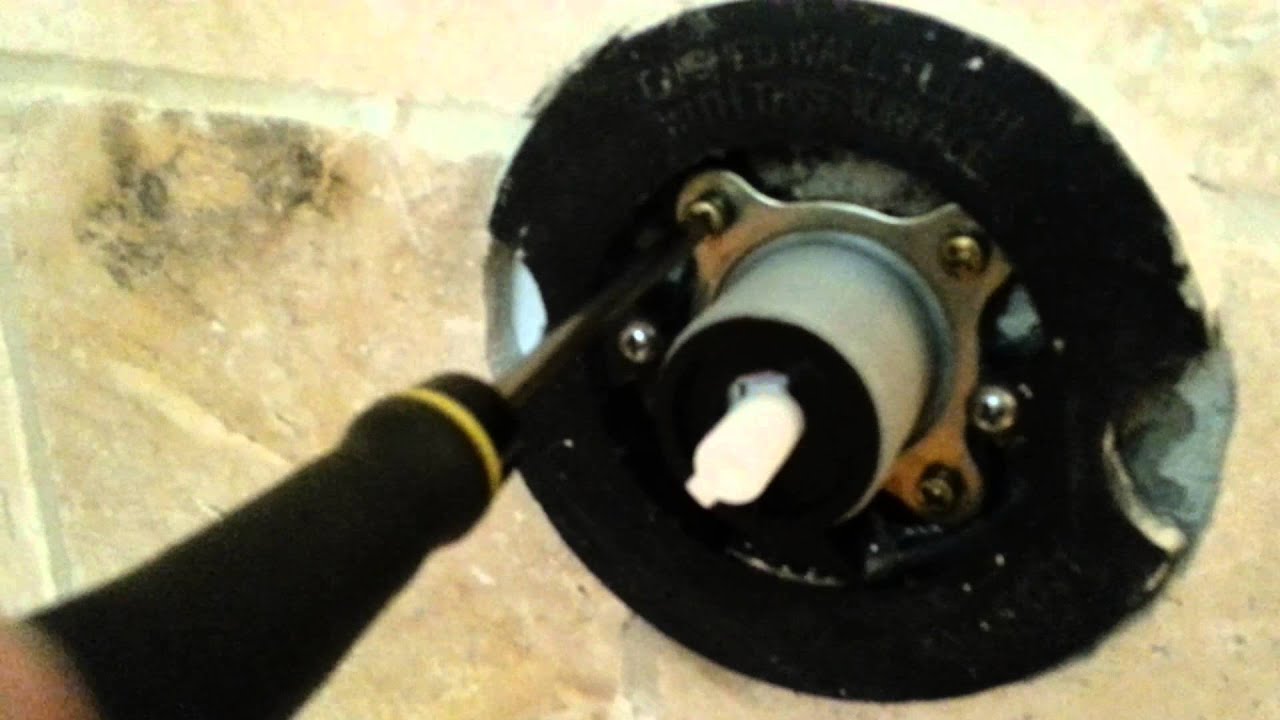
3 To remove the cartridge, unscrew the four screws that hold the dogged-eared mounting flange. Again, turn them counterclockwise to remove them. Reach in and pull the plastic cartridge out of the valve. Be sure the rubber O-rings come out with the cartridge.
4 Use a rag and, if necessary, steel wool to clean the inner surfaces of the valve. Then replace the old plastic cartridge with a new one, and replace the threaded piece and the flange.
5 Be sure the rubber gasket will seal properly. Position it so the orientation is properly aligned. Use the metal ring and four screws to secure it. When it’s tight, turn the water supply back on and check for leaks. If you don’t discover any leaks, caulk around the perimeter of the trim and then replace the escutcheon trim and the handle. Here is a really helpful video that shows this process.
